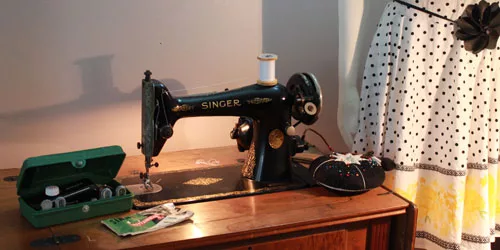
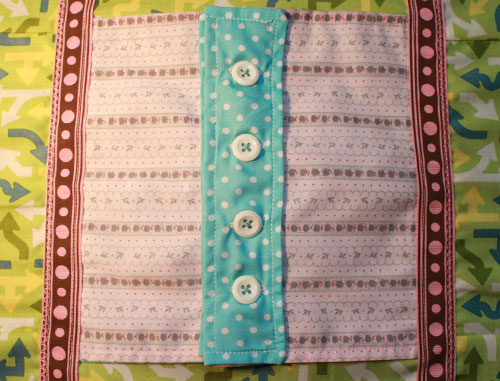
When I purchased my second-hand Singer 66, it came with a very handy buttonholer attachment. I tried it out for the first time while working on a fidget quilt block that needed four buttonholes, and wow, is this attachment ever neat!
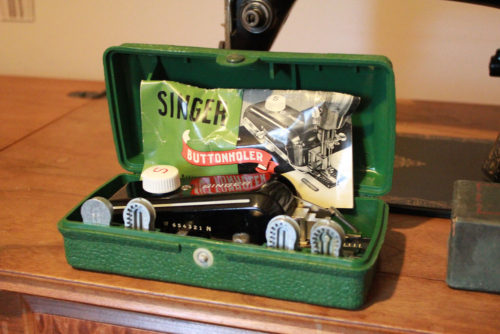
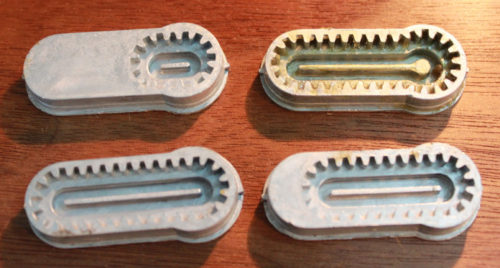
I’m thankful that the previous owner saved her instructions. She even the saved original receipt of purchase for $9.95 in 1954, printed in a Canadian Singer Sewing Machine Company location. I used an inflation calculator from Bank of Canada and discovered that an item that cost $9.95 CAD in 1954 would cost an equivalent of $89.20 CAD in 2015. The attachment comes in a sturdy green plastic case and includes 5 cams and a feed cover plate.

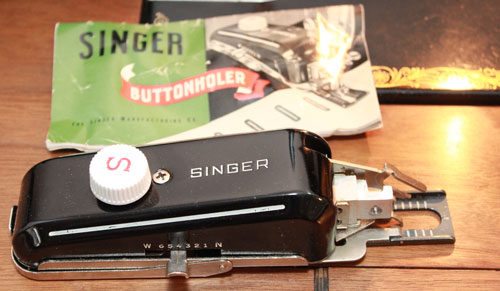
The attachment itself is beautiful and feels heavy duty. When I compare this buttonholer with the flimsy plastic buttonholer attachment that came with my modern Kenmore, the modern one just looks sad.
When you lift the template plate on the bottom of the attachment, you can easily swap out the cams to create different buttonholes. The lines in the centre of the cam represent the length of the hole itself.
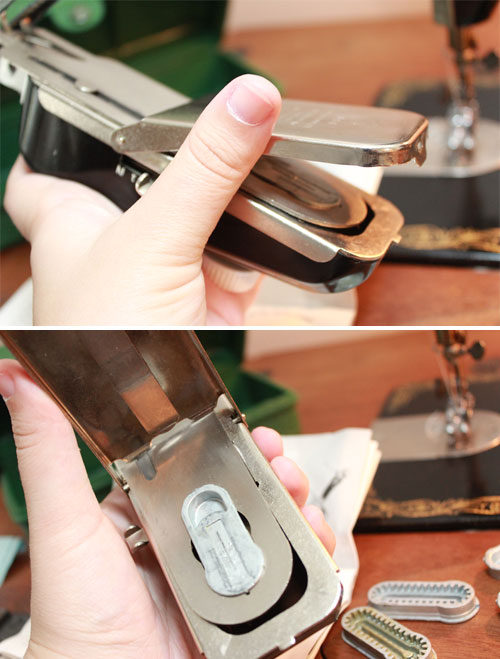
Some of the cams included in my tool were gummed up with grease as you can see below:
Attaching the buttonholer to the sewing machine is easy. Simply take off your screw then attach the feed cover plate using one of the holes on your sewing machine bed. Double check that the needle will line up with the hole on the feed cover plate – you don’t want any needle injuries! You need to cover the plate in place because the buttonholer tool moves the fabric on its own without any need for the feed dogs to be engaged.
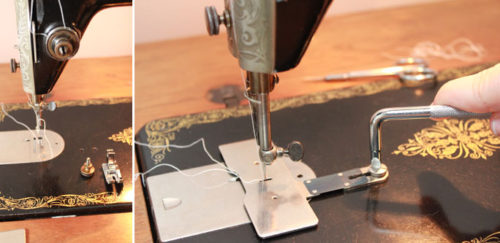
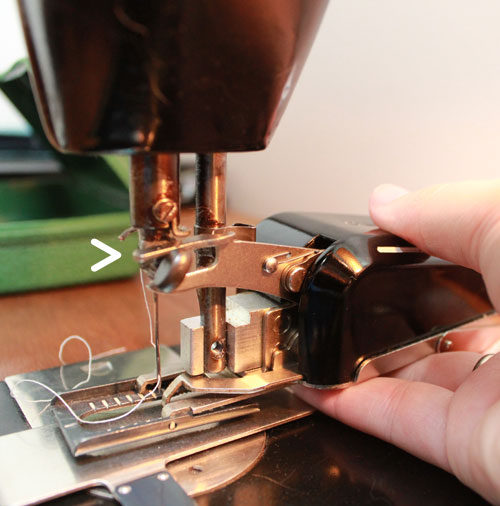
When you attach the foot, you need to make sure that the fork arm hooks over the needle clamp like it does below:
Once your fork arm is in place, simply screw the attachment in place to secure it:
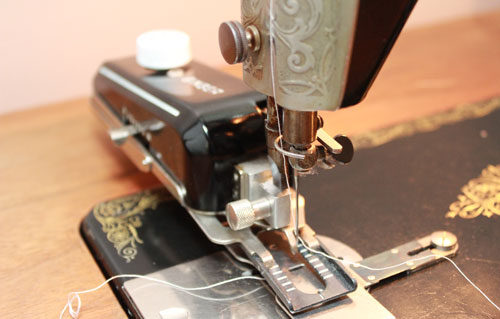
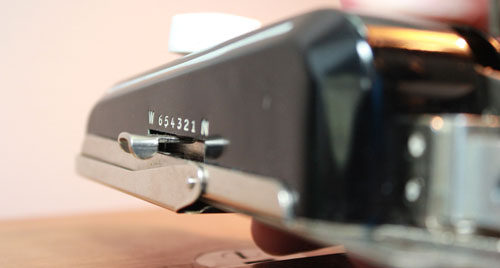
There is a switch on the side you can slide to adjust the width of the buttonhole stitches. Closer to W is wider and closer to N is narrower. Play around with this setting on scrap material to see what you like.
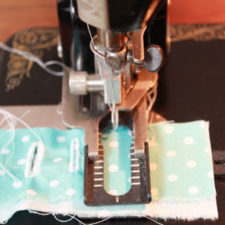
The cams do all the work for you. It’s like magic! Move the dial on the back of the attachment so that the needle will furthest back in the shape of the buttonhole, place your fabric beneath the foot, then lower the foot into position.
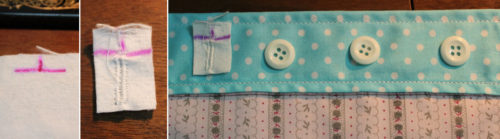
I found it easiest to create a dummy buttonhole before jumping into my actual project. I used a fabric marker to mark the top-centre point where I should begin sewing on my scrap piece of fabric. I sewed using the buttonholer tool after lining up my needle with the marked line. I sewed around the buttonhole shape twice, then cut it out. I placed my dummy buttonhole on top of my actual piece of work, then marked a dot in disappearing ink fabric marker to indicate the top-centre position.
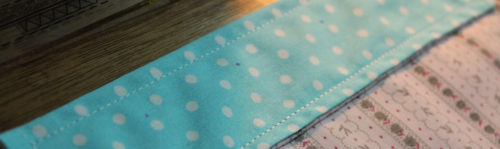
Your buttonholer tool will automatically move your fabric for you. When the tool reaches the bottom of the buttonhole, it will automatically start moving back up to the top. When you reach the position of where you started, I would recommend going around the buttonhole shape a second time. This will make the fine zigzag stitches around your buttonhole look more solid.
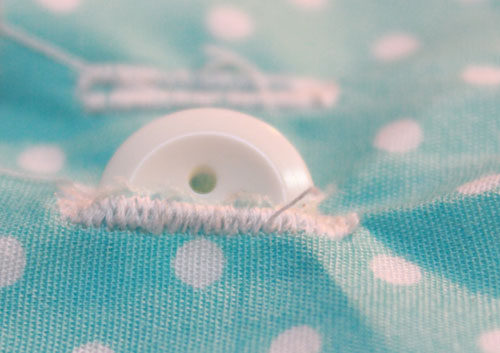
After you sew your buttonholes, you can use a small pair of scissors or a stitch ripper to open up the hole. Be careful when you open this up! You’ll also want to trim any wayward stitches from your starting and stopping threads.

There are some interesting techniques described in the manual, such as creating a wide width buttonhole, then switching to a narrow width buttonhole size and stitching that directly on top for a tailored look. There is also mention of the possibility of using this tool for embroidery purposes, which definitely needs further investigation.
In the past, I never had a desire to make buttonholes because I always imagined that they would be difficult. But ever since trying out this buttonholer tool, I’ve been itching to make some more items featuring buttonholes with this almost-magical attachment.