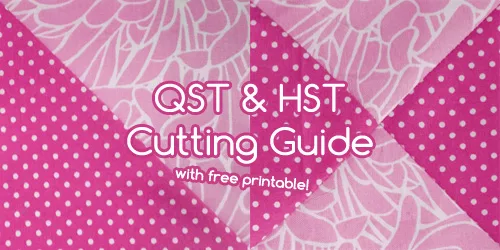
Two building blocks of quilt patterns are the HST unit and the QST unit: the half square triangle and the quarter square triangle. Once you have this skill in your arsenal, the world of quilting opens wide!
The method I will show you in this tutorial will create two units at once rather than one at a time. The process goes a lot faster with minimal extra steps, plus there’s less risk of the triangles getting stretched out due to bias cutting.
This post contains affiliate links, which means that if you click on one of the product links, I’ll receive a little commission at no extra cost to you if you make a purchase.
Supplies:
- Sewing Machine
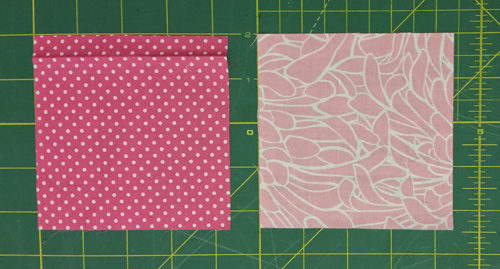
- Two contrasting fabrics, one square of each per pair of desired HST/QST units
- Thread
- Rotary cutter, ruler, and cutting mat strongly recommended; scissors and ruler work fine if unavailable
- Disappearing ink fabric marker (preferably) or pencil
What is an HST Unit?
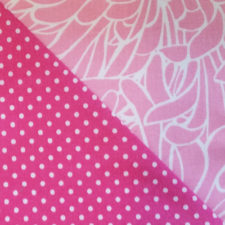
A half-square triangle block is formed by the combination of two right-angled triangles forming a square.
What is a QST unit?
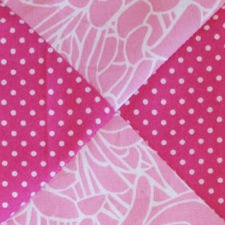
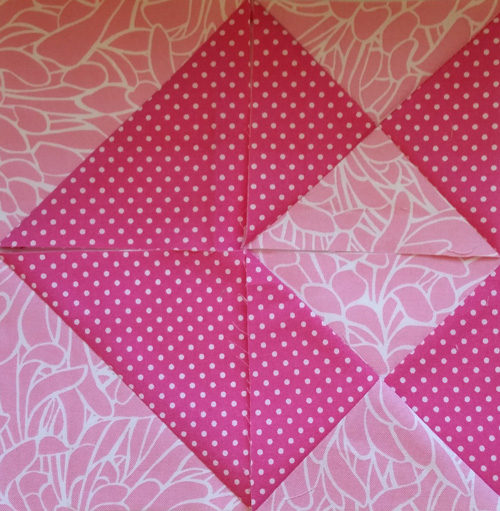
This block is a combination of four isoceles triangles. Essentially, it’s the HST, except that each of the two HST halves are divided into halves as well. Using two fabrics, this unit can look like an hour glass.
What size do I need to cut out my fabric for such-and-such size of HST or QST unit?
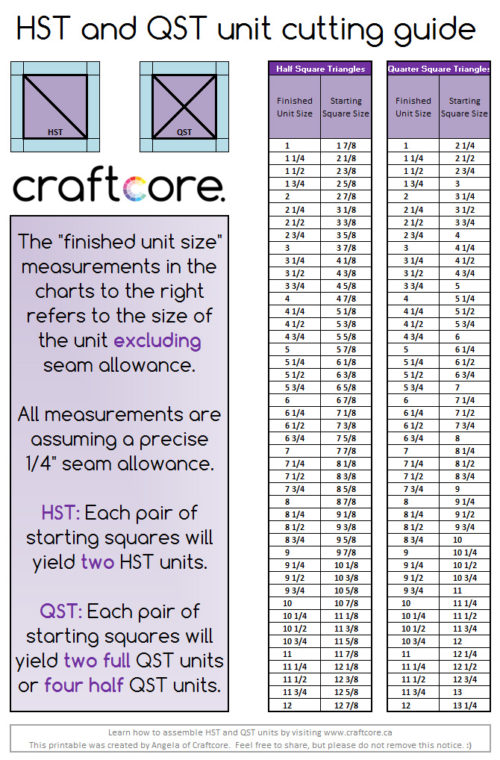
This question is thankfully very easy once you know the formula. This formula assumes you are using a 1/4″ seam allowance.
For an HST unit, you’ll need to cut out your squares 7/8″ larger than your desired finished unit size. So if you want your quilt to have 5″ finished blocks, you would cut out your fabric starting squares at 5 7/8″. Once your HST unit is sewn together, the standalone unit would measure 5 1/2″ to account for the 1/4″ seam allowance on all sides when joining all your blocks together.
For a QST unit, you’ll need to cut out your squares 1 1/4″ larger than your desired finished unit size. So if you want your quilt to have 5″ finished blocks, you would cut out your fabric starting squares at 6 1/4″. Once your HST unit is sewn together, the unit itself would measure 5 1/2″ to account for the 1/4″ seam allowance on all sides when joining all your blocks together.
For your convenience, I’ve created this HST and QST unit cutting guide that indicates the size of starting squares you would need for a variety of finished sizes. If the exact size you need is not listed, use the math above. You can download a high quality PDF version for printing if you want to keep this handy by clicking on the links below the guide preview below!
Thanks in advance!
How to Assemble an HST Unit
- Cut out two squares of coordinating fabric at the size required as per the above chart, referencing the “Half Square Triangle” column.
- Lay one fabric face up, then layer the other fabric face down on top. Using your disappearing ink fabric pen, mark a line across on a diagonal.
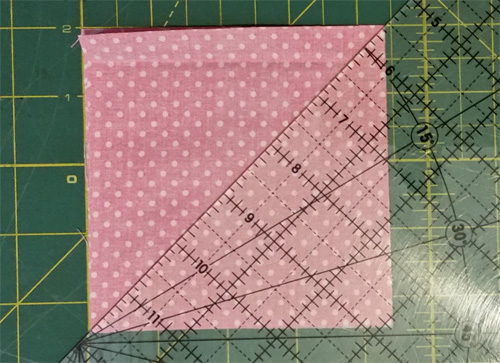
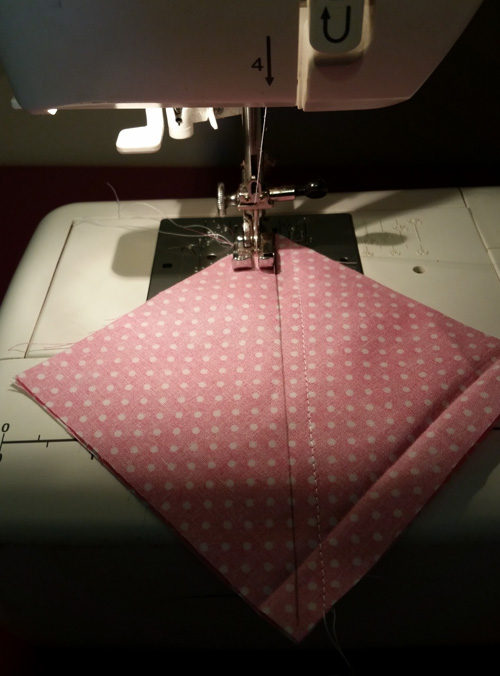
- Using a 1/4″ seam allowance, sew along your guideline. When you reach the bottom, snip your thread, then flip around and sew along your guideline on the other side.
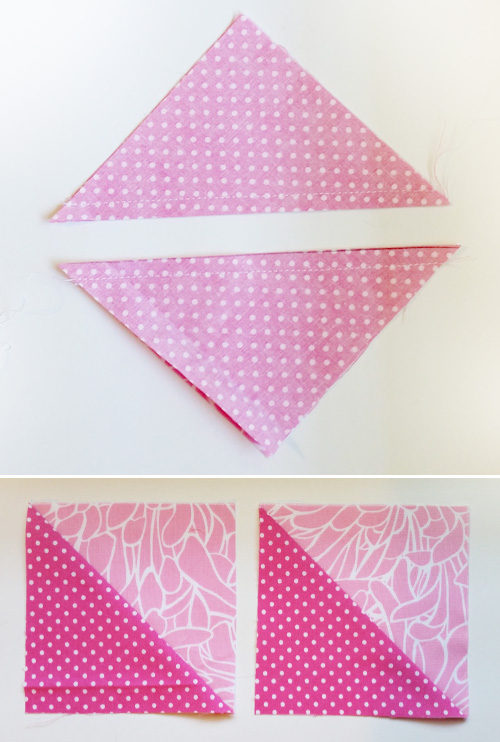
- Take your squares back to the cutting mat and slice along your guideline. Press open your two brand new HST units! Simple, simple!
How to Assemble a QST Unit
Assembling a QST is essentially the same as assembling an HST unit, with a few additional steps.
- Start by following the steps above for an HST, except you will want to use the starting square size indicated on the “Quarter Square Triangle” column instead.
- Once you have two HST units created, take the first one and place the seamed edge along any horizontal line on your cutting mat. Place your ruler perpendicular to this edge and line up the ruler with the point opposite the centre of the triangle. Cut, and repeat for the second HST unit. You now have four sets of half of a QST unit.
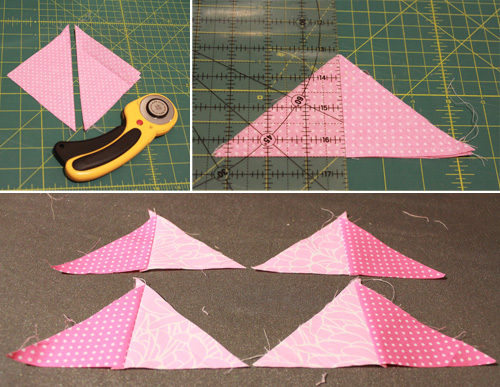
- Now for the tricky part. This takes practice. Iron your four units flat, pressing the seam towards the darker fabric for each one. Take two of the triangles and place them on top of each other, right sides facing in. Line up the seams in the centre so that they line up perfectly, with one seam allowance facing the left and the other facing the right. Be sure to nudge the seam as close together as possible, then when you are confident, pin this in place right at the seam.
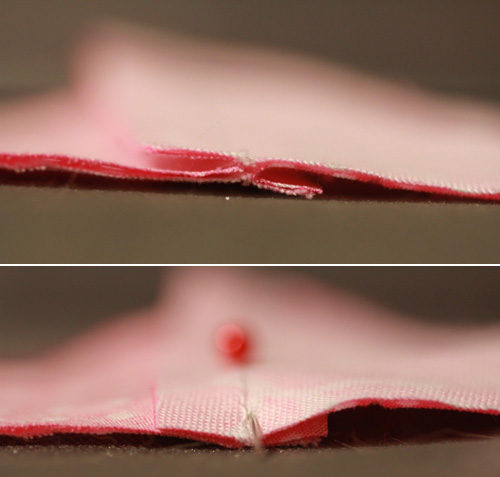
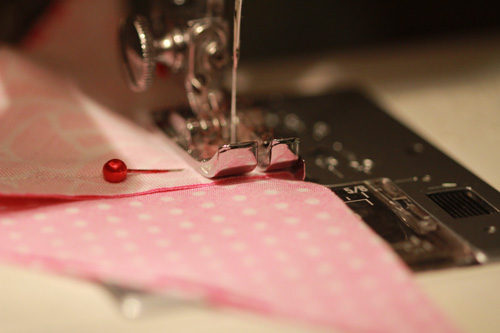
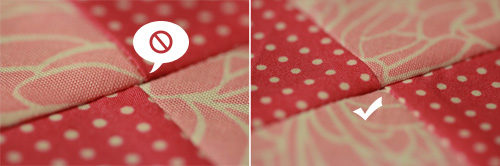
- Sew along this edge, making sure that the points of the triangles at the start and finish are lined up without stretching. Right before you reach the pin, as close as you can get your needle to the pin, be sure to carefully pull the pin out without shifting your fabric. The moment of truth comes when you press open your final result; if you lined up everything correctly, your four triangle points will meet nicely at the centre. If you pinned too loosely or your fabric shifted, you may be a bit off centre. In that case, the choice falls on you whether you’re okay with it or if you want to seam rip and try again.
Now that you know how to make a half square triangle unit and a quarter square triangle unit, you can use this knowledge to create all sorts of pattern combinations. Create a bunch of units and play around with the arrangement. You’ll be amazed what you can come up with!
2 thoughts on “Quilting Basics: HST and QST Printable Cutting Guide”