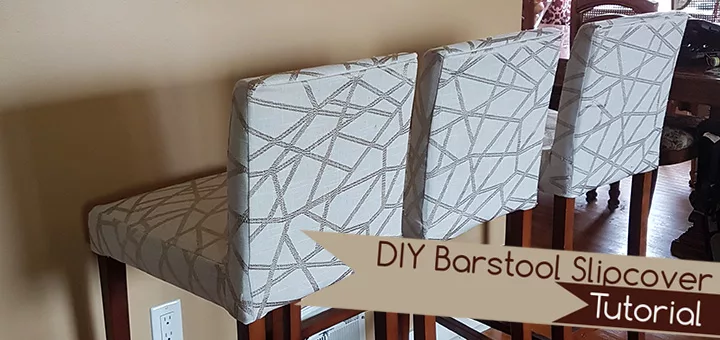
To fulfill my dream of renovating my kitchen on a budget, I tried my hand at making custom slipcovers for my new-to-me bar stools for the breakfast bar we are creating. I didn’t buy a pattern to make these. Instead, I used my handy measuring tape and dove right in and figured things out as I went along.
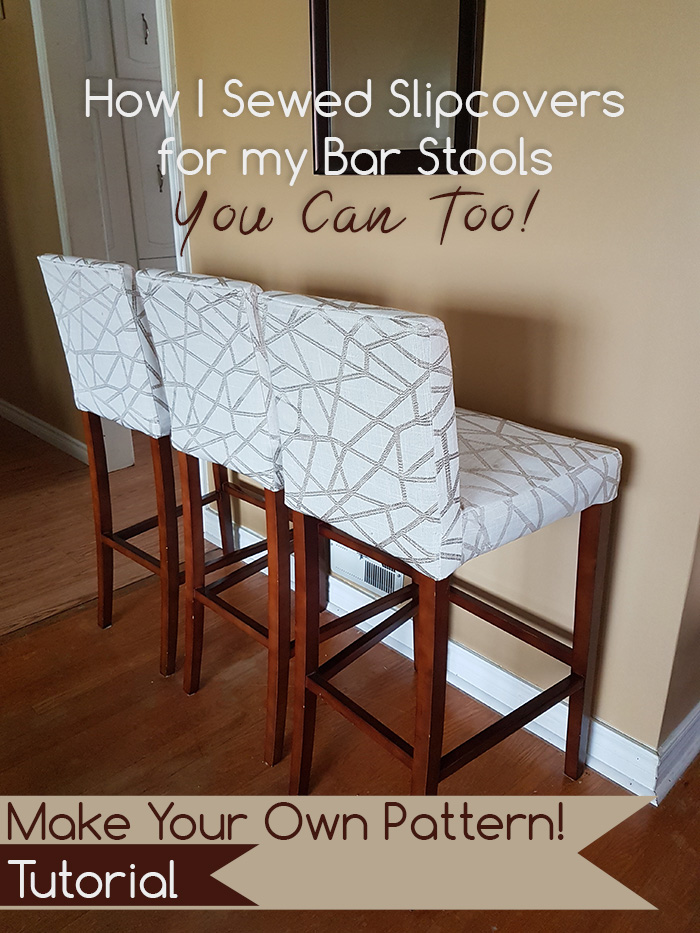
Each chair took approximately 2 infant nap times to cut out, sew, and staple – nap times are how I count time in my life now, apparently. Overall, I’m pleased with the results and am happy to share my process with you. This tutorial will show you how to recover a bar stool that has a rectangular seat and rectangular back meeting at a 90 degree angle like these ones:
Supplies: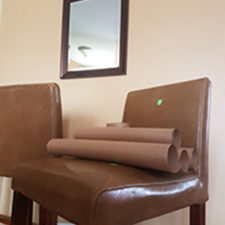
- Roll of Kraft Paper (or any other large paper you have on hand)
- Long Ruler
- Pencil
- Scissors
- Serger (but a sewing machine would be fine too)
- Thread
- Pins
- Fabric
- Heavy Duty Stapler
I recommend making a dummy seat cover first out of fabric that’s similar in weight to the fabric you plan to use but one that you don’t mind messing up. This way, if you need to make any adjustments to the pattern pieces, you won’t have to worry about having wasted any of your good fabric.
How to Sew New Covers for Bar Stool Chairs
- Start by measuring your seats. You’ll need to measure the width and length of the following pieces:
- Seat Back – Front
- Seat Back – Back Side
- Seat Back – Sides (x2)
- Seat Base – Top
- Seat Base – Front
- Seat Base – Sides (x2)
Please note: if your seat shapes are not rectangles and are a trapezoids instead like mine, you’ll need to measure both the smaller width and the larger width along with the length.
- For “Seat Base – Front”, “Seat Base – Sides”, and “Seat Back – Sides”, add an extra 3 inches to the length allow plenty of room to turn it under and staple.
- Next you’ll need to add seam allowances to all measurements. If you are using a 5/8″ seam, add 2 times that amount (1-1/4″) to each length and width measurement from Step 1.
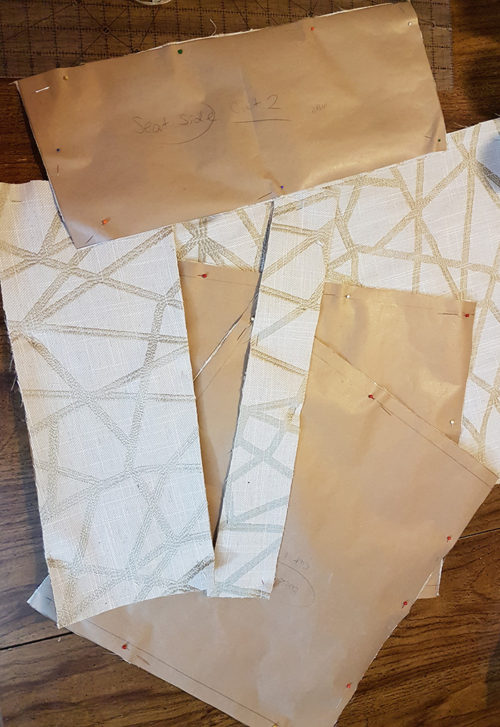
Please note: I decided that I wanted my “Seat Back – Front” and “Seat Base – Top” to be in one piece without a seam line, so I added these measurements together first then added the 1-1/4″ to that summed up measurement. - Using a ruler and pencil, draw out the shapes with seam allowance (calculated in Step 3) on your paper, making sure that all your corners are 90 degrees. These will become your pattern pieces. Be sure to label the pieces clearly in the centre of your drawings so you’ll remember which is which. For the pieces that are multiples (the side pieces), you only need to draw it once, but write a note on your label that mentions to cut it twice.
Please note: if your seat is a trapezoid like mine, I found the easiest way to draw it is to draw the largest width first. Then find the middle of that length and draw the length line perpendicular to that. Next, draw the smaller width parallel to the first line, centered along the middle line you just drew. Finally, connect the two ends of the parallel lines to finish the trapezoid. - Cut out all your pattern pieces.
- Lay the pattern pieces on top of your fabric and cut them out.
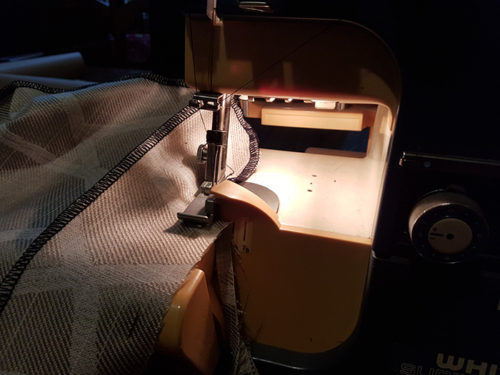
- Drape the fabric pieces on your chair, wrong sides out, pinning the right sides together. Then, one by one, start sewing the pieces together using a 5/8″ seam allowance. I used my serger for this but you could definitely use a sewing machine and still be fine.
- I started the process by draping the “Seat Back – Front”, “Seat Front – Back Side,” and “Seat Base – Top”, sewing those together to form one long piece.

Please note: for one of my chairs, I have Seat Back – Front and Seat Base – Top as two separate pieces and for the other three of the chairs I cut these out as one joined piece. Either option works, I just preferred it without the seam line. - Next, I pinned the “Seat Base – Front”, “Seat Base – Sides”, and “Seat Back – Sides” in place.
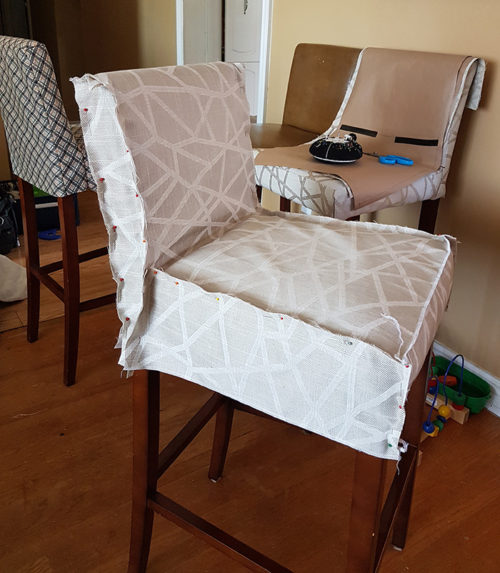 My original seat had a little curve at the top of the chairs so I eased in a curve while sewing to give the back of the chair a little of the same shape. I sewed the “Seat Back – Sides” first, then sewed the seams for the “Seat Base – Front”.
- I started the process by draping the “Seat Back – Front”, “Seat Front – Back Side,” and “Seat Base – Top”, sewing those together to form one long piece.
- Flip your work right-side out and try it on your chair to make sure that everything fits as expected. If it fits nicely, you’re ready to tuck under the excess fabric and staple it into place.
- Prior to tucking, you could also serge or zig zag the bottom edges to prevent fraying but it’s not absolutely necessary. The edges should not be exposed since they’re tucked and stapled anyway.
- You could remove the old fabric but I didn’t bother. I just stapled right over my old stuff since you can’t see through the new fabric and the old padding was in great shape.
- Prior to stapling, I pinned the folded fabric in place so that it wouldn’t shift while stapling. I’m not sure if I’m just weak with the stapler, but I had to put my full force with both hands to engage the staple gun, so pinning helped a lot since both hands were already in use.

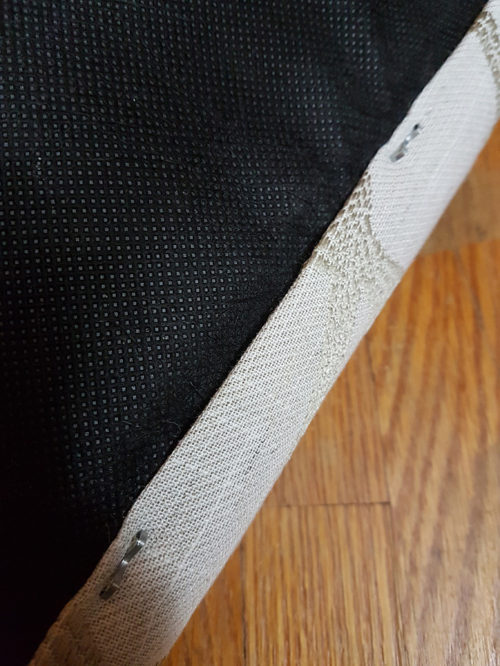
- Take special care when stapling around the legs.
Overall, I’m really pleased with how my chairs turned out, especially since I had never sewn slip covers before and was basically just playing it by ear. The only experience I had with this kind of thing was making a cover for two garden gazebos as a commission a few years ago (which I wish I had taken photos of: red and orange stripes spreading outwards from the peak of the gazebos – it looked beautiful!).
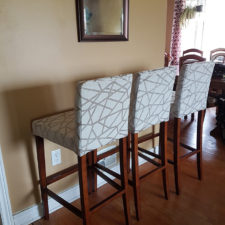

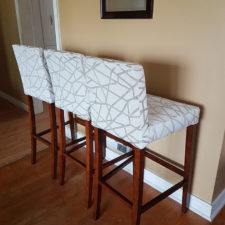
One thing that I would change if I were to do this again is my fabric choice. I chose a lovely lightweight jacquard: a soft light beige linen-texture background with geometric lines in a darker beige on top. The darker colour have a slight sheen. I absolutely LOVE the print and the fabric. However, as a multi-cat household, it appears that my cats also love the fabric: they love it too much I must say. I’m already starting to get little pulls in the fabric from their little claws. It’s a shame! I most likely will have to remake the covers in a few years with a hardier fabric, but I’ll enjoy them while I can. I’ve kept my pattern pieces in an envelope so I can easily remake them if necessary.
Cats. Gotta love them.
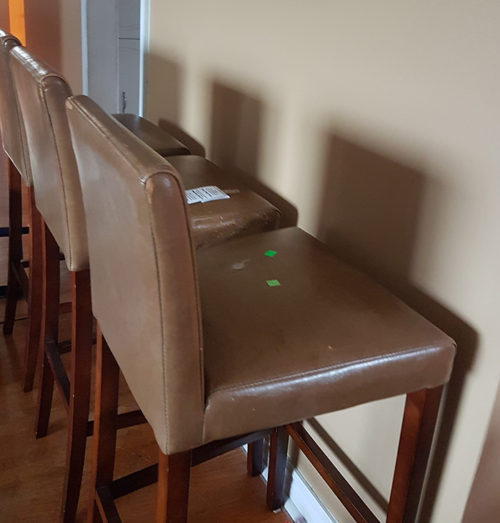
Now before I wrap up this post, I’ve got to tell you more about these bar stools. For my kitchen renovation’s new breakfast bar area, I knew I would need to get bar stools, but I didn’t realize I would be able to pick up the stools so inexpensively and so quickly in my hunt. I peruse the thrift stores often, and I stumbled across these bar stools for a mere $5 each at Habitat for Humanity! I couldn’t believe my luck. The seats are leather and definitely had seen better days, but honestly, I would have expected to pay more for these. I only needed three stools for the breakfast bar, but I bought the fourth one that was available because at that price, why not have a spare seat handy?!
My fabric cost more than the chairs, but even then, the overall cost per chair was low. I spent $50 on the fabric and $20 on the chairs for a grand total of $70 invested, or an average price of $17.50 per chair. Score! I never would have been able to find bar stools new for that price.
Since the breakfast bar doesn’t exist yet, I have a hilarious living room right now with three bar stools facing an empty wall. Haha! But it’s all slowly coming together. I’m looking forward to taking the next big step in the project soon: smashing a hole in that wall!
1 thought on “How to Sew Bar Stool Slipcovers Tutorial”