
Last week, I sewed up this infant dress for my two-month-old daughter. No pattern; I just measured around her and cut and sewed. All the fabric stores are closed due to COVID-19, so I pulled all the fabrics from my stash:

- The grey fabric is quilting cotton. I had jussssst enough for this project with this little scrap piece. I’ve used this fabric often as an accent fabric, and I’m a bit sad that it’s all used up! Of course, I’m happy to use it up on a gift for my daughter.
- The blue and white star fabric on the skirt and upper trim is from a very cheap fat quarter fabric set I bought on Aliexpress a few years ago. The fabric is very lightweight. I had bought it for quilting, but the thread count is much lower quality compared to anything else I’ve purchased. Not good for quilting, but it seemed perfect for a summer dress!
- The gingham fabric on the lining of the straps is from that same fat quarter set. I originally was going to self-line the straps with the same grey, but I was a little short and I didn’t have enough of the blue stars either. I think it turned out cute with the gingham! I absolutely love navy.
Infant Dress Basic How-To
This isn’t going to be a formal tutorial, but I’ll tell you the general measurements that I used to make this dress for my two-month infant daughter and basic assembly instructions.
- Accent Fabric (Grey)
- Bodice: cut one 4.5″ x 20″ piece of fabric
- Ruffle Trim: cut one 4.5″ x 20″ piece of fabric & cut one 4.5″ x 40″ piece of fabric.
- (Time Saving Tip: When cutting the above fabrics, you can cut two 4.5″ strips from a full width of fabric, then cut one strip in half length wise to form the Bodice and trim.)
- Straps: two 5″ x 10″ rectangles
- Main Fabric (Navy Star)
- Bodice Neckline Binding: cut one 3″ x 20″
- Skirt: cut one 9″ x 40″ piece of fabric (if using a fat quarter precut fabric, sew together two 9″ x 20″ piece of fabric to form a 9×39.5″ piece with 0.25″ seam allowance)
- Lining Fabric
- Straps: two 5″ x 10″ rectangles
Infant Dress Sewing & Assembly
Here are the basic assembly instructions to put together this dress.
- Take the bodice binding strip, B, and fold it in half width wise to transform it into a 1.5″ x 20″ strip. Press with an iron. Open again, then fold each edge to meet the middle, transforming it into a 0.75″ x 20″ strip. Press with an iron.
- Take the ironed strip and slip the bodice fabric, A, in between the folded binding strip layers. Top stitch into place close to the folded edge. Set aside.
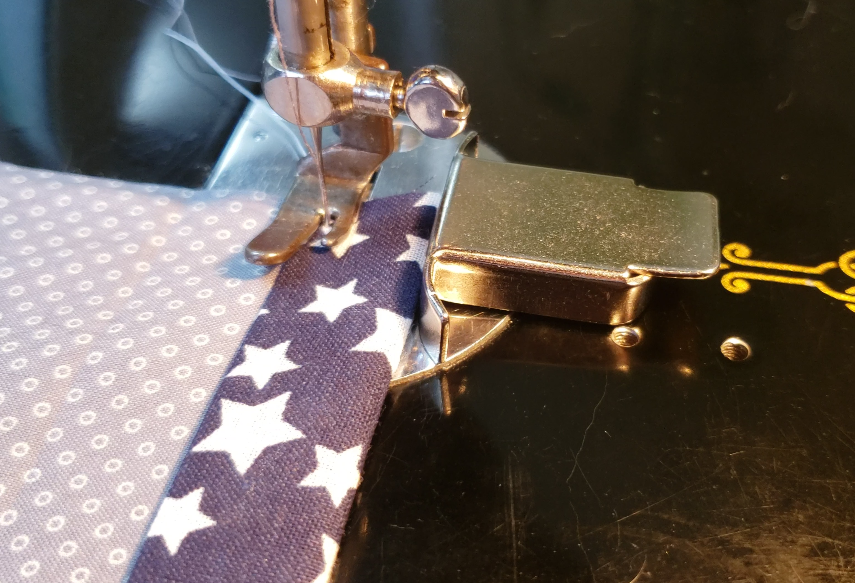
- Take the Ruffle Trim fabric, D, and sew strips together to form one long strip. Fold it in half width wise to form a 2.25″ wide strip.
- Ruffle the fabric using a Ruffler foot, OR, alternatively, use a basting stitch then gather the fabric by hand. Ruffle it so that the length is 40 inches.
- Sew the ruffle to the bottom of the Skirt, C. If you used a Ruffler foot and there is any excess, trim any extra ruffle after sewing into place.
- Press the ruffle towards the skirt then top stitch on the skirt close to the ruffle.
- Now, gather the top of the Skirt, C, so that the top of the skirt measures 20″. You’ll have something that looks like this:

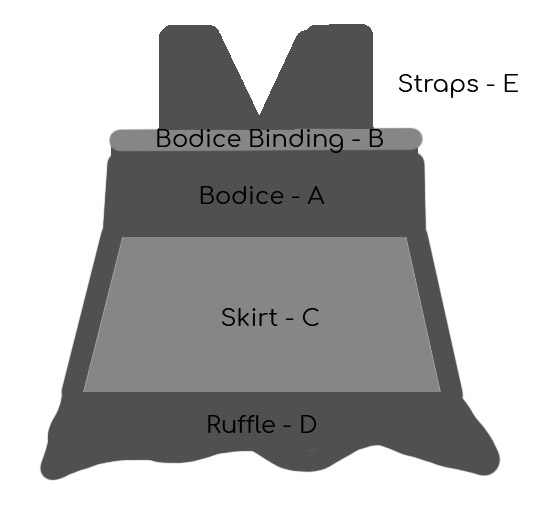
Bottom: Bodice A with Bodice Binding B
- Sew the skirt, C, to the bottom of the bodice, A.
- Now you have the basic shape of the outfit, excluding the straps. Make a very narrow 1/4″ hem along both raw left and right sides of the dress.
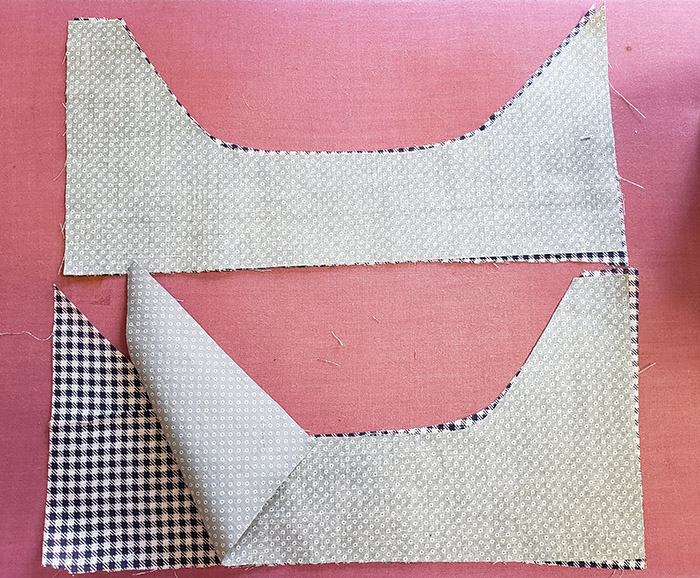
- Time to make the straps! Pair up the rectangle strap pieces (lining and accent fabric) so that right sides are together. Create a shape like below where the fabric uses the full width at the 5″ ends, then comes in to become a 2″ wide rectangle at the centre, like in the image below. Sew around the perimeter, leaving a gap to turn the straps right side out.
- At this point, I put the dress on my daughter and aligned the straps so that the triangles overlap at the centre (almost like wrap-style neckline) and pinned the straps into the desired positions. Stitch into place. At the centre front, there are a lot of layers, so I used the handwheel on my sewing machine to slowly move over those layers to help move everything along.
- At the back of the dress, I overlapped the edges of the dress to hand sew on some snaps as closures. I hand-sewed 3 snaps, evenly spaced on the bodice section of the dress, then sewed closed the skirt and ruffle of the dress.
For the purpose of making this dress, I didn’t bother with finishing the edges of the ruffles, etc, with a serger. Babies grow so fast so I kept it simple. If you like you could serge these edges or use a zig zag stitch for longevity.
I hope this mini-tutorial inspires you to create an infant dress of your own!

While making this project, I really appreciated having my ruffler attachment. Seriously, this thing is awesome. With the ruffler, it was so fast to make this outfit in an afternoon. If you’ve never used one, I recommend checking out my video regarding how to use a ruffler!
How to Attach and Use a Ruffler Foot Attachment
Pin for Later! How I Sewed this Infant Dress
