In 2014, I took up running as a hobby and exercise source. My lifestyle is pretty sedentary, with a desk job 9-5 and crafting and reading most evenings. I moved from being unable to run for more than 30 seconds to running a half-marathon within a year. I’ll just put it out there – I have fallen in love with running!
You would imagine that a hobby like running would be pretty inexpensive since it’s just you and the pavement for the most part, but the incremental costs can really add up. Race entrance fees, decent running shoes, moisture-wicking clothing, energy gels, hydration packs. I’ve purchased a bunch of different styles of hydration solutions, from a simple water bottle holder, a waist-belt system, and a camel-back water backpack for a summer half-marathon.
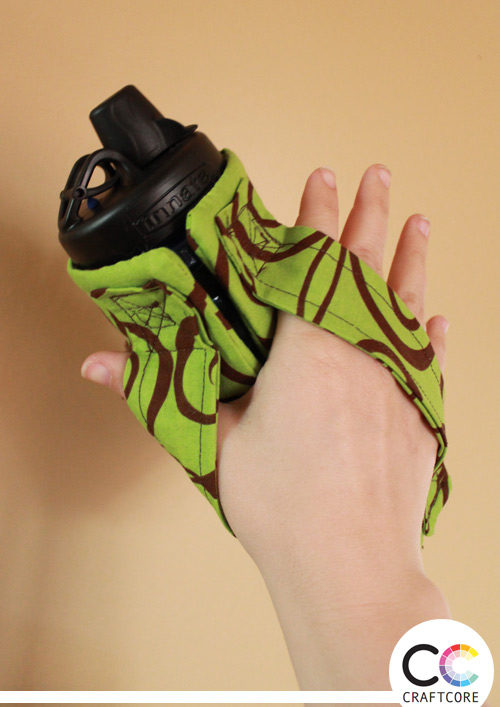
My favourite solution is a simple hand-held water bottle because the water backpack is usually too much water for a routine run in standard weather conditions and the belt seems to always slide off my waist and past my hips (apple body type problems). However, since I take a gel supplement after every 45 minutes of running, I need place to store two gels for a long distance training run. I often tuck them into my bra, but that can become uncomfortable fast!
 I don’t have the budget right now to be buying yet another running accessory. That means it is time to DIY!
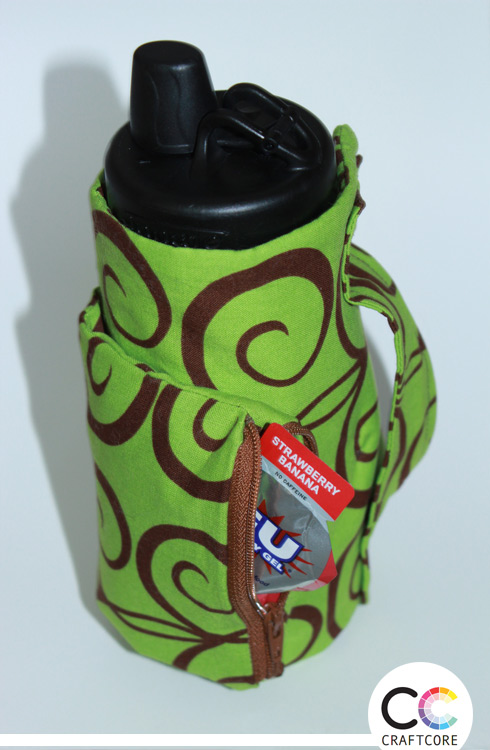
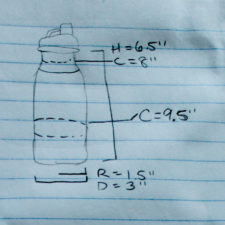
I designed this for my favourite water bottle (diagram pictured at right), which has a diameter at the base of 3″. However, I’ve put in a slightly taller Underarmor bottle into it, and it fits in just fine. You may need to make slight adjustments to the three “main body” rectangles if your bottle has a wider base or is significantly taller.
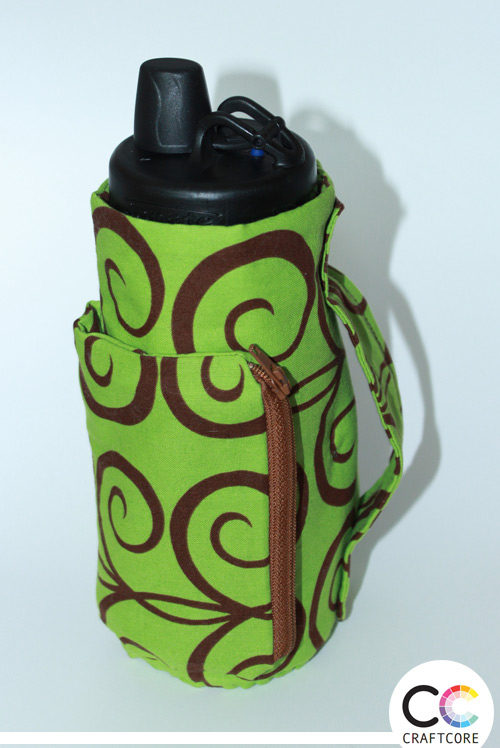
The best part of this project is that it doesn’t take much fabric, and absolutely everything came from my stash. This tutorial will show you how to make your own water bottle holder with a pocket for two gels. If you don’t use gels, you could stash keys, money, or other small items in it. Mine fits two GU brand gels.
Supplies
- Water bottle that you love
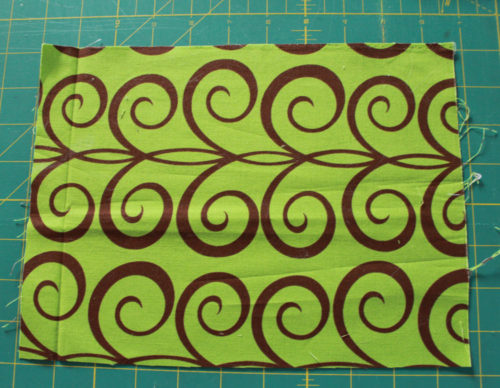
- Fabric for exterior, fabric for lining (see Task One below for amount necessary). I used the same fabric for the lining and exterior.
- Cotton quilt batting
- Thread
- Elastic, 5″ long in total, 0.5″ wide (but any width is fine)
- 5″ zipper
- Iron (recommended)
Task One: Cut Out The Pieces
- Three rectangles for the main body of the holder, 10 5/8″ x 8″ each – one out of exterior fabric, one out of lining fabric, one out of quilt batting
- Four rectangles for the lined pocket, 5.5″ x “5” each – two out of exterior fabric, two out of lining fabric.
- Two rectangles for the handles, 2″ x 15.25″ each – both out of exterior fabric
- Three circles for the base of the holder, 4″ in diameter – one out of exterior fabric, one out of lining fabric, one out of quilting batting
- Two elastic pieces, 2.5″ wide each
Task Two: Assemble the Lined Pocket
Let’s start with the pocket. Essentially, we are actually making a zipper pouch that we will attach to the outside of the holder.
- Place one 5.5″ x 5″ exterior fabric face up on a flat surface.
- Place your 5″ zipper face down, centered along the 5.5″ edge.
- Place your lining fabric face down on top of the stack. Pin the three layers together.
- Sew along the edge. When you’re done, flip the fabric over, then repeat for the other side.
- Open up the zipper more than half way, then bring your two exterior fabric layers together, right sides facing each other. The zipper will fall into a V shape, where the two edges of the zipper will face the exterior side of your pouch, and the point of the V shape, the zipper body, will face towards the lining side of the pouch. You can see a photo of this V shape in my original zipper pouch tutorial on Step 7.
- Bring your two lining fabrics together, right sides facing each other.
- Sew around the perimeter of the exterior fabric, leaving no gaps.
- Sew around the perimeter of the lining fabric, leaving at least a 2″ gap on one of the sides.
- Pull through the inside layers to the outside through the gap and ensure that the corners of both the lining and the exterior layers are completely pulled square.
- Sew the gap closed then push the lining fabric back inside the pouch. Press the zipper pocket flat.

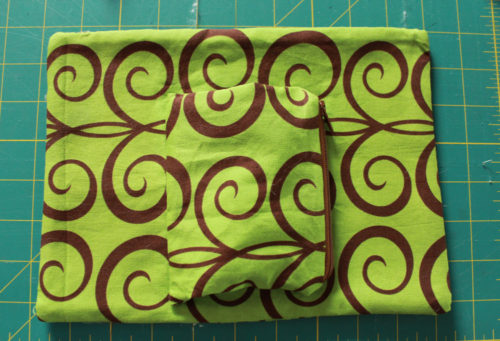
Task Three: Attaching the Pocket
- Take your exterior holder fabric rectangle and place it face up on a surface.
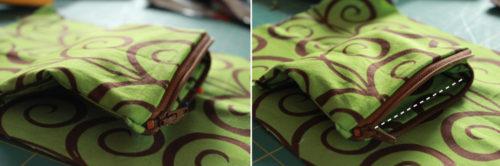
- Place your zipper pocket in the centre of the fabric with the zipper aligned vertically on the right hand side of the pocket with the head of the zipper closest to the top when closed.
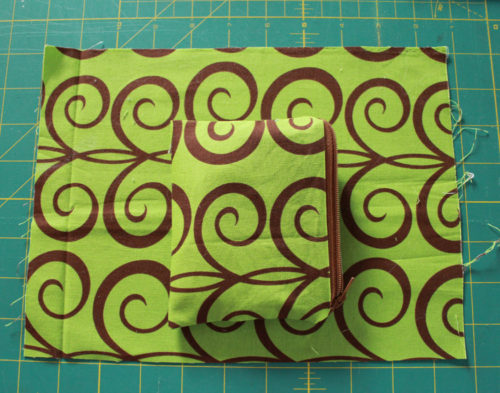
- You’ll want to attach the pocket along the leftmost edge of the pocket, but you don’t want the stitching to show on the outside. To achieve this, imagine that the stitch line is already in place and flip the pocket so that the zipper that was on the right is now far on the left side. Pin it in place.
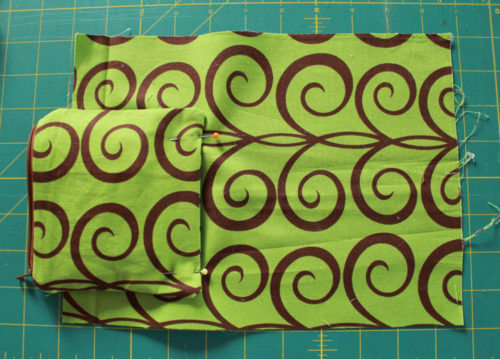
- Sew a vertical line with a scant 1/4″ seam.
- Now that you have the seam in place, flip the pocket back to its original position.
- Open up the zipper if it isn’t already. You’ll want to sew another vertical line to tack down this side of the pocket. Only sew through the two layers closest to the holder as close as you can to the edge of the zipper. Instead of having the pocket lie perfectly flat, you can shift is slightly to the left by a 1/4″ or 1/2″ or so, in order to create a bit of a bump. This will allow a little extra room for any objects you put in the pocket to expand into the bump.
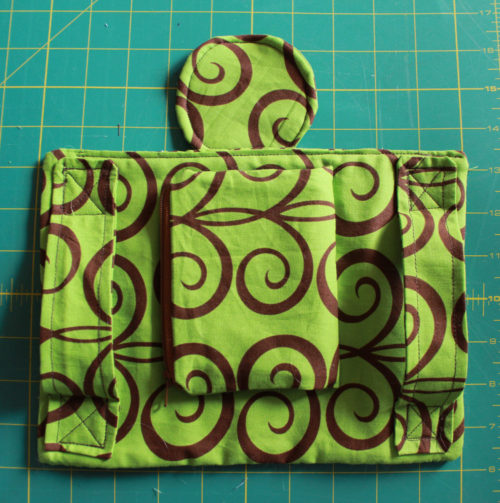
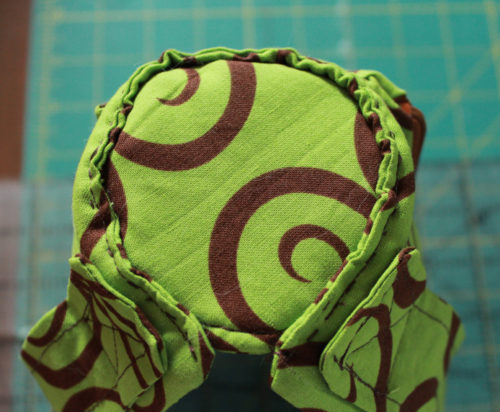
Task Four: Assembling the Cylinder
- Take your exterior fabric with the pocket attached and place it on a flat surface. The pocket should be facing up.
- Take your lining fabric and place it on top face down.
- Take your quilt batting and place it on top of the pile.

- Pin your layers in place. Sew around the perimeter with a standard sewing foot at the middle needle position, pivoting at each corner. Leave a gap of two inches or so along the bottom edge, backstitching at the beginning and end of your journey.
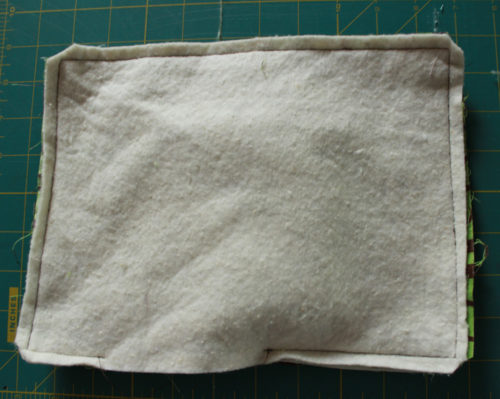
- Pull the inside to the outside through the gap in the stitching, being sure to pull the lining and quilt batting layers together. Ensure you pull out the corners completely so they are perfect 90 degree angles.
- You’ll want to top stitch along the bottom edge to close the gap that you pulled the fabric out through.
Task Five: Attaching the Handles
- Fold the two long skinny rectangles so that you have two 2″ x 7.5″ (approx) rectangles, right sides facing in.
- Sew around the perimeter of the non-folded edges, leaving a gap for reversing.
- Pull the lining through the gap, ensuring the corners are perfectly pulled out at 90 degree angles.
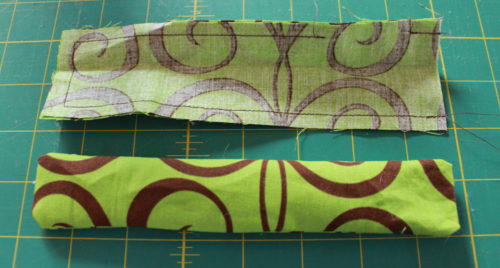
- Press and top stitch around the perimeter of the rectangles, ensuring the gap is closed in the processed.
- Take one handle and pin it into position on the left side of the main holder body. Pin it so that there is room for your handle to slide in between the top and bottom.
- Repeat for the right side.
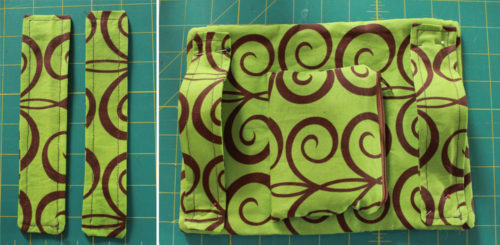
- Sew the handle in place by sewing a square with an X inside.
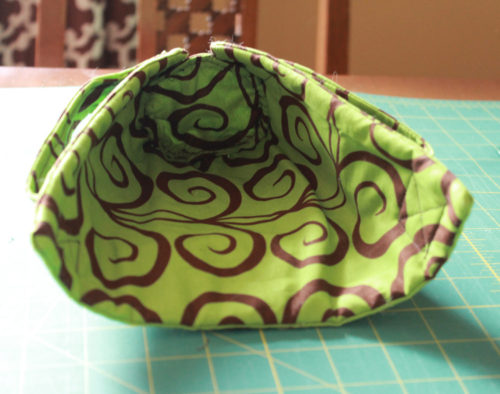
Task Six: Assembling the Base
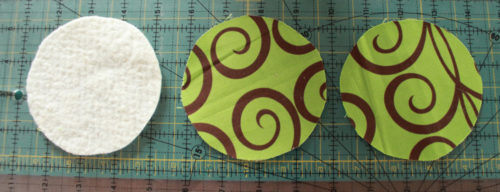
- Place your quilt batting circle on a flat surface.
- Place your lining circle face up on top of the quilt batting.
- Place your exterior fabric face down on top of the pile.
- Sew around the perimeter using a scant 1/4″ seam, leaving a gap of 1.5″ or so.
- Pull the inside to the outside through the gap in the stitching, being sure to pull the lining and quilt batting layers so they are together.
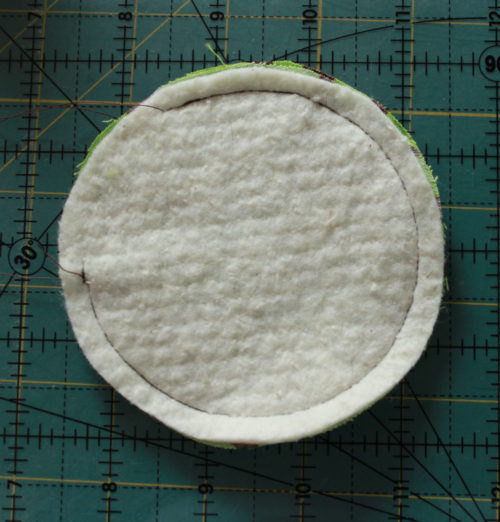
- Iron flat then top stitch your circle so that the gap in the stitching is closed.
- Centre the circle against the bottom middle of the main body of the holder and pin in place so that the edge of the circle will face the inside, not the outside of the holder.
- Hand sew the circle in place. You should have a slight gap where both ends of the main body meet.
Task Seven: Fastening the Elastic
- Place your water bottle inside the holder for reference.
- Place and pin the elastic inside at the top of the holder. I chose a spot where there was a indent in my bottle.
- Take out the bottle then machine or hand sew the elastic into place, whichever is easier for you. I machine sewed mine, but it doesn’t look super. If I were making it again, I would hand sew for extra precision.
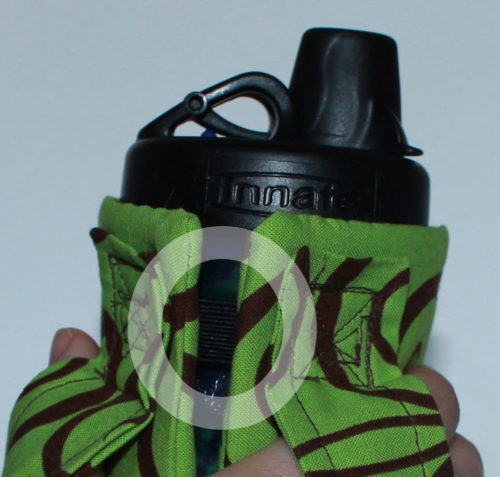
- Place a second piece of elastic in the middle of the holder.
- Machine or hand sew into place. My machine couldn’t reach, so I hand sewed this one into place.
Task Eight: RUN!
Once the elastic is in place, you can fill up your bottle and slide it into place. Put a few gels or other small accessories into the zipper pocket, and you’re all set for your next long run!