Since my craft supplies end up taking over all my drawers and boxes, I like to compartmentalize them into small origami boxes that are quick and easy to make.
The best part is that these boxes only require two sheets of 12×12″ scrapbook quality paper each. You can even adapt these instructions to make mini versions out of any square size piece of paper.
Supplies
- 12×12″ scrapbook paper – cardstock weight works best for the sake of sturdiness
- Paper cutter or scissors
- Tape if desired (not required)
The most critical tip I have for the creation of this box is to make sure you crease all your folds. This will allow your box to keep its shape and fit together perfectly. Crease, crease, crease!
Video Tutorial Option
Update: I’ve also created a video version of this tutorial if you’d prefer to follow along with a video instead of written and photo instructions! You can view that video here on Craftcore.
Step 1:
Gather your supplies.
Step 2:
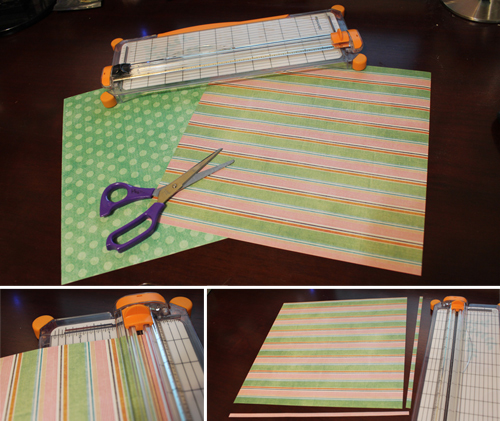
Cut 1/4″ off two adjacent sides on one sheet of paper. This sheet will be the bottom of your box.
You should now have one 12×12″ sheet for the lid and one 11.75×11.75″ sheet for the base of your origami box.
Step 3:
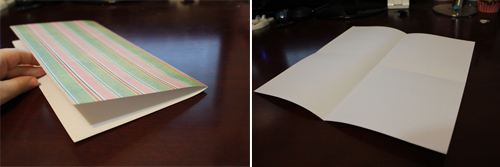
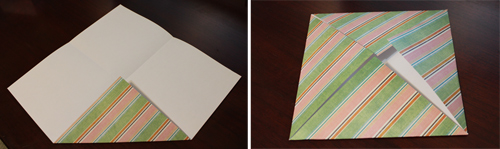
Take the smaller of your sheets and fold it in half with the printed side facing the outside.
Open it up and fold it again in the opposite direction. Open it up. You should have a folded cross on your paper.
Step 4:
Using the creases as a guide, fold each corner into the centre of the creases.
Step 5:
Open your paper flat again. Take a corner and make it reach the centre of the newest crease line on the opposite side. Open it up and repeat for each corner.
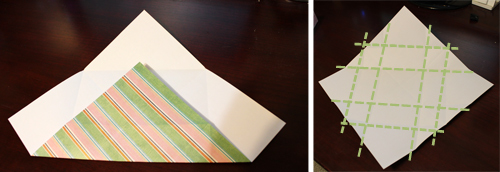
You now have a second crease guide on your paper that looks something like the green grid in the right-hand diagram above.
Step 6:
Open your paper flat again. Take each corner and fold it so the point touches the centre of your newest set of creases.
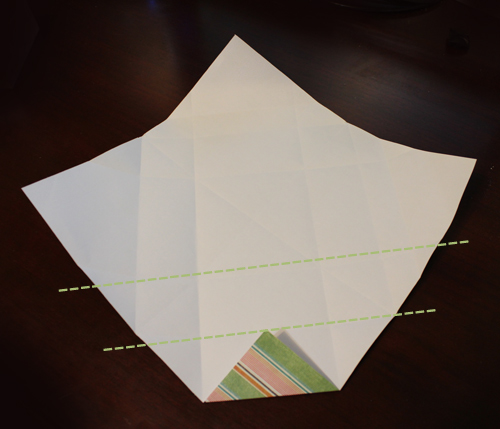
Step 7:
Using your scissors or paper cutter, carefully slice four lines following the black dotted lines in the diagram below. The X crease in the centre will become the base of the box, and these cut lines should just meet up with them.
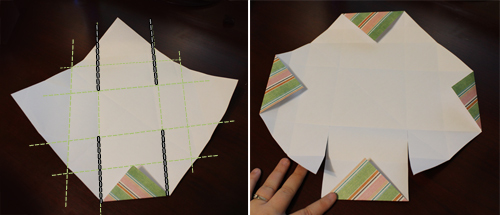
Step 8:
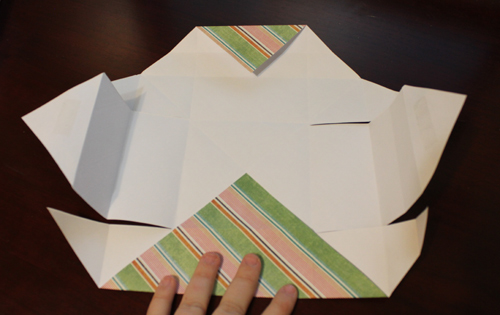
You will now have four flaps. Two of them will be skinny pointed flaps, and two of them will be wider triangular flaps.
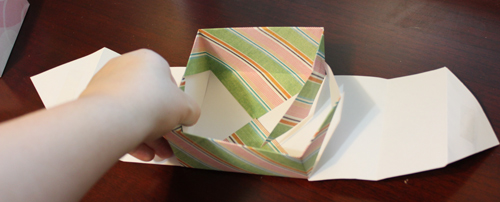
Take one of the wide flaps and fold it so that the point reaches the exact centre of the sheet of paper where the X creases meet.
Step 9:
Imagine that there is a line connecting the two cuts along the edge of this flap. Keeping the point in the centre, fold the paper along this imaginary line.
Step 10:
Unfold this latest fold so that your flap’s point is still at the centre. Fold the right side of the flap onto itself as indicated in the dotted line in the diagram below.
Step 11:
Repeat for the left side.

Step 12:
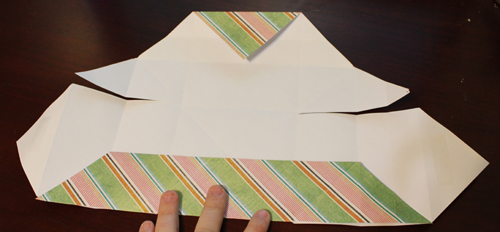
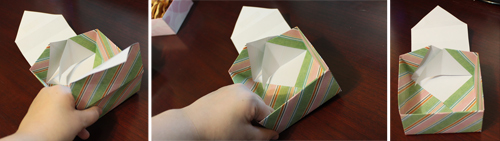
Refold the long edge of the flap along the imaginary line and unfold the left and right sides of the flap towards the opposite side of the piece of paper. You should have a structure resembling a piece of a box.
Step 13:
Repeat steps 8 through 12 for the other wide flap.

Step 14:
Now that both wide flaps are structurally sound, pinch together the two pairs of triangular flaps so that they are sitting nicely against each other. This is a good opportunity to ensure that all four corners of the box are perfectly creased.
Optional: if you are worried about your box falling apart, you can certainly put a piece of double sided tape underneath your triangles. Make sure that the flaps perfectly meet at the centre of the X crease.
Step 15:
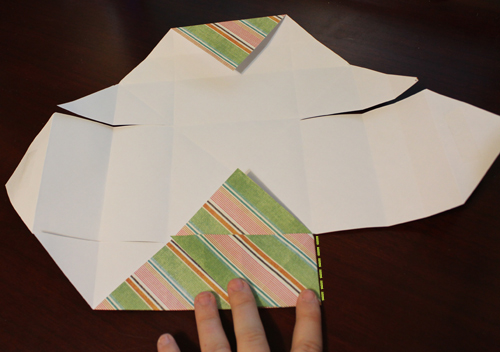
Take one of the skinny flaps and fold it over the two side triangles. The point of the skinny flap should line up perfectly with the points of the wide flaps at the base of the box. Repeat for the other skinny flap.
Step 16:
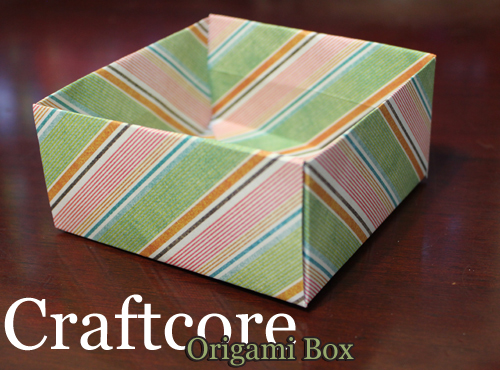
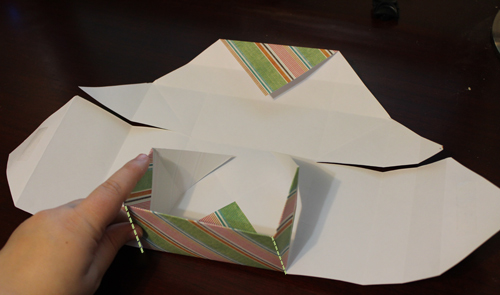
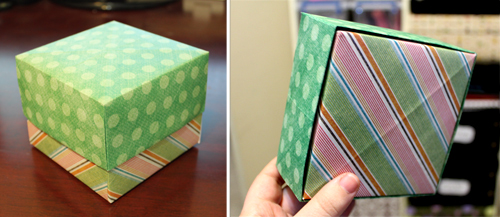
Admire your beautiful box. Then take a deep breath and make a second one with the other piece of paper to use as a lid and take comfort in the fact that the second time will go much quicker and easier than the first time.

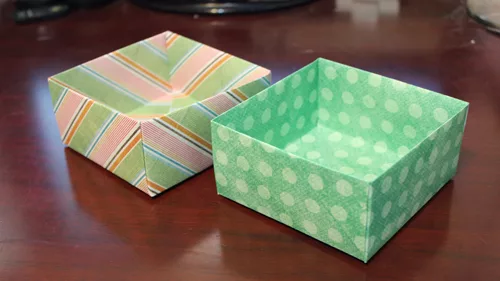
Since we cut off the 1/4″ inch of paper from two sides, the one box will fit over the other as a lid.
I like to create simple labels for organizing supplies or when using the box to hold a small gift. A simple rounded corner paper punch with a coordinated colour pen makes it look super cute.
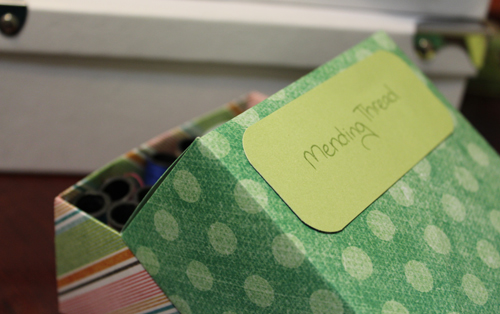
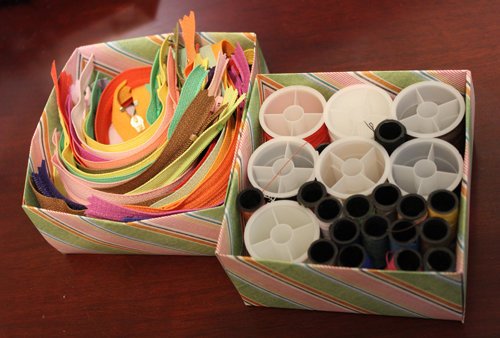
I discovered that these boxes fit beautifully in the inexpensive cardboard boxes Dollarama sells. I used this box to hold my zippers and tiny mending threads, with enough room on the side to store rolled-up long invisible zippers.

I hope you enjoy making these boxes as much as I do. They are great for gifts or organizing tiny objects that seem to accumulate in drawers and boxes.
2 thoughts on “How to Make an Origami Box out of Scrapbook Paper”